
Embarking on the journey of food truck ownership in vibrant Lakewood? One key aspect of ensuring your kitchen runs smoothly is having a reliable water pump system. Not only does it facilitate cooking, dishwashing, and hygiene practices, but it also ensures compliance with health regulations. Whether you’re anticipating a bustling day at the local park or a scenic lakeside event, understanding the right water pump to choose, how to install it, and the best maintenance practices is crucial. This article breaks it all down into easy-to-follow chapters—for aspiring food truck operators, the path to success begins here.
Selecting the Right Water Pump: Matching Flow, Pressure, Power, and Safety for Your Food Truck

Selecting the Right Water Pump: Matching Flow, Pressure, Power, and Safety for Your Food Truck
Choosing the correct water pump for a food truck is more than picking a unit off a shelf. It requires balancing how much water you need, what pressure your fixtures require, the electrical limits of your vehicle, and strict health and safety rules for potable systems. This chapter walks through the practical decisions you must make so the pump you install performs reliably, fits into a compact space, and meets code requirements. The aim is a unified view that connects operational needs with equipment selection, installation realities, and long-term upkeep.
Start by imagining a typical service period. Multiple sinks may be in use while a sanitizer cycle runs and a dishwashing station draws a burst of water. Peak demand determines the pump capacity, not idle use. Flow rate, measured in gallons per minute (GPM), is the primary metric here. Add the expected simultaneous draws: each hand sink, prep sink, and dishwasher has a nominal flow. Multiply and include a safety margin of 20–30% to avoid under-sizing. Under-sized pumps strain, overheat, and shorten component life; oversized pumps cycle too often and waste power. Aim for a pump whose rated GPM matches the truck’s peak water demand with a modest buffer for unexpected loads.
Pressure is the second pillar. Fixtures and appliances often need specific pressure to work correctly. Hand sinks operate fine at lower pressures while instantaneous heaters, steamers, or certain specialty appliances may need higher, steady pressure. Measure the required operating pressure in pounds per square inch (psi) for each device and design the system around the highest requirement. Remember that pressure drops across long hoses, fittings, and filters. A pump must supply enough pressure at the appliance end after accounting for those losses. For many food truck setups, a working range of 40–60 psi is common, but verify every appliance spec before deciding.
Electric compatibility is non-negotiable. Food trucks typically run on limited DC systems—commonly 12V or 24V—or on AC through an inverter when shore power is available. Choose a pump designed for the vehicle’s available voltage and ensure the electrical load fits within the truck’s power budget. A pump that draws heavy current on startup can trip breakers or drain batteries quickly. For battery-powered systems, calculate amp draw at typical duty cycles and sized battery capacity to maintain reliable service through a busy day. Include a fuse or circuit breaker sized to the pump’s requirements and incorporate a safe wiring route with weatherproof connectors and protected terminals.
Water quality and regulatory compliance shape pump choices for potable systems. Materials that contact water must be rated for food service: NSF certification or equivalent denotes safe materials and construction. Pumps specified for potable water reduce the risk of contamination. If your operation handles both potable and non-potable lines, keep them separate with clear labeling and backflow prevention devices to avoid cross-contamination. Regulation compliance extends to backflow prevention, accessible shutoffs, and the use of certified tubing—EPDM or food-grade PVC are common choices. Local health departments may have additional rules; always verify before finalizing equipment.
Pump type matters for space, noise, reliability, and maintenance. Submersible pumps fit inside tanks and free up cabinet space; they operate quietly and are often compact. They work well when tank access and ventilation allow. However, submersible pumps can be harder to service without removing the tank or installing an access port. Diaphragm pumps excel in portability and are forgiving with inconsistent supply; they are tolerant of air in the lines and can run dry briefly without damage. Their design often suits potable water applications because they maintain water quality and avoid oil or lubrication that could contaminate the supply. Centrifugal pumps deliver continuous flow and are efficient at higher volumes, but they are more sensitive to air entrainment and may require priming or anti-siphon devices. Match pump type to your tank design, serviceability needs, and the likely presence of air or debris in the system.
Space constraints inside a food truck are real. A compact, efficient pump is critical. Consider physical dimensions, mounting orientation, and the need for anti-vibration mounts. Short, direct plumbing runs reduce friction losses and the chance of leaks. Place the pump close to the tank to minimize suction lift—ideally no more than a few feet above the tank level. If the pump must be above the tank, choose a self-priming model rated for the required lift. Allow clearance for servicing and for routing electrical and water lines safely away from heat sources and grease-prone areas.
Noise and vibration affect the crew and customers. Use rubber mounts or anti-vibration pads to isolate the pump. Enclosures with ventilation can dampen sound, but ensure airflow for motor cooling. Pumps that run continuously, such as those on pressure systems without an accumulator, may need quieter models or additional baffling. If a pressure switch is used, the pump will cycle, which can generate repeated noise bursts. An accumulator tank smooths pressure changes and reduces cycling frequency, extending pump life and improving acoustic comfort.
Protection features are practical necessities. A check valve on the outlet prevents backflow and maintains system prime. A pressure relief valve guards against overpressure events and protects plumbing. Strainers or sediment filters at the tank outlet prevent debris from entering the pump. If your system includes a pressure switch, ensure it is properly rated and located in an accessible position for adjustment and maintenance. Thermal protection on the motor and dry-run protection on diaphragm models add resilience against misuse or accidental operation without supply.
Maintenance implications should influence the selection. Access to serviceable parts—diaphragms, seals, and impellers—saves time and money. Pumps with replaceable, commonly available components reduce downtime. Create a maintenance plan that includes periodic inspection intervals, filter replacement schedules, and a log of pump runtime and repairs. Labeling hoses and valves and leaving a schematic inside the utility compartment makes troubleshooting easier for any technician.
Efficiency ties back to energy use and operating cost. Select a pump that provides the needed flow and pressure with minimal electrical draw. Efficiency matters most when operating on batteries or a small generator. Match pump duty cycle to the workload. If the pump will run intermittently, a diaphragm pump with low standby current may suit. For continuous use, a centrifugal pump paired with an accumulator offers efficient steady operation. Consider a pressure switch or controller to avoid continuous running and to automate starting and stopping based on demand.
When planning the purchase, think beyond the pump itself. Include fittings, hose sizes, quick-connects, pressure gauges, a check valve, and a pressure relief device in the budget. Use appropriate hose diameters to maintain flow without excessive friction loss; undersized hoses will reduce flow and make the pump work harder. Threaded connections need compatible materials and sealing, such as food-grade O-rings or approved tape at pipe threads. Keep a small parts kit aboard—a spare check valve, seals, and common clamps can save a service call.
Safety and compliance remain guiding principles. Ensure every component touching potable water is certified for such use. Install backflow prevention to meet local codes and to protect the public water supply. Follow wiring rules, secure connections, and protect wiring runs from heat and moisture. Where shore power is used, ensure the transfer between shore and onboard systems is safe and code-compliant. Document the installation and keep manuals and certification paperwork with the vehicle to simplify inspections.
Finally, consider the broader operational context. A well-chosen pump integrates with the truck layout, complements chosen appliances, and scales with menu and traffic patterns. If you plan to expand the menu or add new fixtures, select a system that offers capacity headroom or is modular so an upgrade is straightforward. For startup vendors assessing truck models and layouts, exploring options for prebuilt utility compartments and provisions for pump installation can be valuable; a helpful resource on suitable truck platforms can guide those choices. For example, a guide to appropriate food truck chassis and layouts discusses features that make pump installation simpler and more serviceable.
Selecting the right water pump is a design decision that touches electrical planning, plumbing efficiency, regulatory compliance, and day-to-day operations. Prioritize flow and pressure needs first, then confirm electrical compatibility, certification for potable use, and physical fit. Factor in noise, maintenance access, and protective devices to create a resilient system. With careful selection and forward thinking, the pump you install will support safe service, reduce downtime, and deliver consistent performance in the tight, demanding environment of a food truck.
External resource for installation diagrams and further specifications: https://www.waterpumpusa.com/installation-guides
Internal resource for choosing truck models that simplify utility installations: best food truck models for Lakewood startups
Fitting the Heart of Your Water System: Practical Steps to Install a Food Truck Water Pump
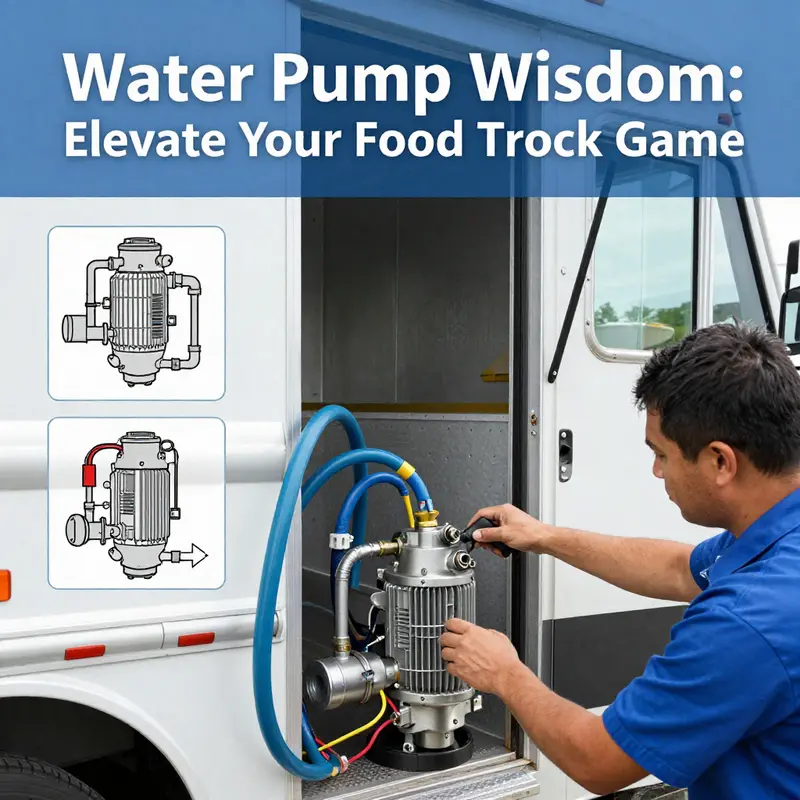
Choosing and positioning a pump starts with purpose. For a food truck, the water pump is more than a piece of equipment; it is the heart of daily operations. It supplies clean water for handwashing, dishwashing, cooking and beverage service, and it must do so reliably and hygienically. Before lifting a wrench, confirm whether you need a potable freshwater pump, a graywater pump, or a vacuum-assisted unit. Most food trucks will install a centrifugal freshwater pump sized for the tank and fixtures in use. A correct choice sets the stage for smooth installation, minimal maintenance, and compliance with health regulations.
When you select the pump, cross-check its electrical and flow specifications with the truck’s power and plumbing. Match voltage and current ratings to your battery bank or inverter, and verify the pump can deliver the pressure and flow you need. Keep in mind that a pump rated for potable water must be paired with food-grade tubing, fittings, and seals. Use manufacturers’ specifications to size inlet and outlet hoses so the pump does not cavitate or overwork. With the right pump in hand, plan its location with care.
Pick a location that balances accessibility, ventilation, and protection. Ideally, mount the pump close to the freshwater tank and away from heat sources such as stoves or exhaust ducts. Choose a dry, flat surface that offers enough clearance for maintenance, and make sure the area is free of sharp edges and moving parts. Use rubber mounts or anti-vibration pads to lower noise transmission and reduce stress on fittings. If possible, house the pump inside a small utility compartment to shield it from the elements while still allowing airflow.
Think about serviceability. Technicians and you will need to access the pump for filter changes, wiring checks, and possible replacement. Place the unit where hoses can be routed with gentle bends rather than sharp kinks. Avoid running electrical wiring near hot water lines to prevent insulation damage. Plan for a drain or drip pan beneath the pump to catch any accidental leaks during testing or repair.
Gather tools and materials before starting. Typical tools include adjustable wrenches, pipe wrenches, screwdrivers, pliers, wire strippers, and a multimeter. Materials include food-grade hoses and tubing, quick-connect or compression fittings, threaded adapters, Teflon tape for threaded connections, hose clamps, a check valve, and an inlet filter or strainer. Also have grommets, conduit, a dedicated fuse or circuit breaker, and vibration isolators ready. Confirm all tubing and fittings are rated for potable water and meet local health codes.
With the pump location set and parts at hand, shut off power and water. Safety comes first: disconnect the truck’s battery or turn off the inverter, and close the main water valve. Drain any remaining water from the system so you work on dry lines. Use protective gloves and safety glasses as needed. If you will be routing through the truck’s wall panels or bulkhead, drill pilot holes and use rubber grommets so wiring and hoses do not wear through over time.
Mount the pump using the supplied bracket or a custom-built mount secured to the truck’s frame or wall. Ensure the mount is level and fasten with bolts and locknuts. Install rubber washers beneath the pump feet to minimize vibration transfer. If the pump is heavy, reinforce the mounting surface and use multiple attachment points. Align the pump so inlet and outlet ports are easily accessible; misalignment can stress hoses and fittings.
Before connecting plumbing, install an inlet strainer between the tank and pump to protect the impeller from debris. A fine mesh screen (for example, a 100-mesh) will stop particles that might enter the tank during filling or that have settled in the bottom. Secure the strainer to the tank outlet with appropriate fittings and make sure it is serviceable for regular cleaning.
Attach the inlet hose from the tank to the pump’s intake port. Use food-grade hose and clamp or compression fittings as required. Keep the hose length short to reduce suction losses. Avoid high points that can trap air; where necessary, install a loop or vent to help bleed air during priming. For threaded joints, apply Teflon tape and tighten to the recommended torque. On the outlet side, connect a food-grade hose to the pump’s discharge port, and run it to the plumbing distribution manifold that feeds sinks and appliances.
A check valve installed immediately after the pump outlet prevents backflow when the pump is off. This keeps the system pressurized and extends pump life by reducing cycling. In systems with significant elevation changes or long runs, consider adding a pressure relief valve to protect the pump and piping from overpressure. If you plan to automate pump operation, install a pressure switch between the pump and the network to start and stop the pump based on demand.
Electrical work should be completed with the power off. Route pump wiring through conduit or protective sleeving, and use grommets where wires pass through panels. Connect the pump to a dedicated fused circuit. Use weatherproof connectors where exposure to moisture is possible. Verify wire gauge matches the pump’s current draw and the run length; an undersized wire risks voltage drop and overheating. Keep wiring runs clear of heat sources and moving components.
Tip: include a dedicated on/off switch or relay in the control panel, and label it. Where possible, integrate the pump control with the truck’s master power so it cannot be left on when the truck is shut down. If you are unsure about electrical work, consult a licensed electrician to verify connections and grounding.
Once plumbing and wiring are completed, tighten all fittings and check that clamps are secure. Reopen the freshwater tank valve and allow water to flow towards the pump; this primes the inlet and reduces air pockets. Many pumps require priming before they can pump reliably—follow the manufacturer’s guidance. Slowly power up the pump for the first time while observing for leaks and listening for unusual noises. A smooth hum is normal; grinding, whining, or irregular vibration signals a problem and requires immediate shutdown.
Test every outlet one by one. Open sinks and dispenseers to ensure steady flow and that pressure builds as expected. If you installed a pressure switch, the pump should cycle on demand and maintain a range typically consistent with 40–60 psi in many setups. Adjust the pressure switch if necessary but stay within safe limits. Inspect each joint for seepage and tighten as needed. If air pockets cause sputtering, perform a bleed test by opening all faucets briefly to purge trapped air.
After you confirm water flows correctly and the pump operates smoothly, run a longer test to check for heat buildup and to verify that the pump can sustain the expected duty cycle. Observe electrical draw with a multimeter to confirm it stays within the pump’s rated current. Listen for vibration transfer to cabinets or nearby fixtures and add isolation pads if the noise is excessive.
Documentation and labeling improve long-term serviceability. Label inlet and outlet lines, the fuse or breaker, and the on/off control. Record installation details such as pump model, electrical ratings, hose sizes, filter type, and the date of installation. Keep a maintenance log for filter cleaning, seal replacement, and runtime. Routine checks every month and a more thorough inspection annually will catch wear before it becomes a failure.
Maintenance practices that preserve food safety and uptime include replacing filters on a regular schedule, inspecting hose clamps and seals for corrosion or fatigue, and checking wiring insulation for brittleness. Use only potable-rated replacement parts for components that touch drinking water. For graywater pumps or utility pumps, use appropriate non-potable-rated fittings but maintain separation from potable lines to avoid cross-contamination. Install a backflow prevention device where required by local regulations.
Consider small upgrades to increase reliability. A pressure gauge lets you monitor system health at a glance. A small accumulator tank downstream of the pump can reduce cycling and provide a short buffer of pressurized water. Integrating a low-water cutoff prevents the pump from running dry if the tank level falls. In mobile operations, redundancy can be valuable: a spare pump or a portable hand pump can keep service running during repairs.
Regulatory compliance matters. Ensure all materials and the finished system comply with local health department standards for mobile food vendors. Use food-grade tubing and certified components for potable systems. Install backflow prevention and follow disposal rules for graywater. Keep documentation on-site in case an inspector requests details about the water system.
Finally, remember that manufacturer instructions and local codes take precedence over any general guidance. Complex systems or installations that require structural changes or electrical rewiring should be reviewed by a professional. If you are building a food truck from scratch or choosing a model that must accommodate a specific pump layout, consider guidance on vehicle selection and build options to ensure your water system integrates cleanly. For inspiration on truck layouts and design choices that make equipment installation easier, see this guide on choosing vehicle models for startups.
External reference: For detailed diagrams, wiring guides, and recommended installation practices specific to commercial vehicle water systems, refer to the supplier installation resources at https://www.waterpumpusa.com/installation-guides.
Flow That Keeps the Kitchen Running: Maintenance and Testing for Water Pumps in a Mobile Food Truck
A water pump in a food truck is more than a machine; it is the lifeline that sustains cleanliness, efficiency, and compliance on the move. In a compact mobile kitchen, the difference between a smooth service and a rushed emergency often hinges on how well the water system is cared for. The most common choice in this setting is a compact, electric diaphragm pump that runs off the vehicle’s 12-volt or 24-volt electrical system. It is designed for reliability, but reliability is earned through deliberate maintenance and disciplined testing. When the pump stays in good shape, it quietly delivers steady pressure to sinks, dishwashers, ice makers, and any other faucet or appliance that depends on clean, pressurized water. When it isn’t, the consequences ripple through every station on the truck: dishes pile up, water flow wanes, and the clock keeps ticking toward a service disruption. That is why this chapter treats maintenance and testing not as chores to check off, but as a daily discipline that protects food safety, operational uptime, and the overall reputation of a mobile kitchen.
Routine maintenance begins with a steady eye on leaks. In a small space, even a few drips matter. Leaks around hose connections, fittings, or clamps can degrade pump efficiency and, worse, create electrical hazards if moisture migrates toward wiring. A habit of quick visual checks at the end of each service shift becomes a powerful safeguard. Inlet and outlet hoses should be inspected for cracks, wear, or stiffening that could indicate impending failure. When you spot fraying or aging hose material, plan a replacement before a mid-service leak disrupts operations. The habit pays back in reduced downtime and cleaner work environments. Cleaning is another essential habit. The intake side of the pump often carries debris or sediment from the water source. If a screen or filter is fitted to the inlet, it should be cleaned on a schedule that fits your water source quality. In dusty or debris-prone environments, that schedule shifts toward monthly or even more frequent cleanouts. A clogged inlet starves the pump of water and can cause overheating or cavitation, which shortens the pump’s life and undermines performance.
The electrical skin of the system deserves equal attention. The pump relies on the truck’s battery bank, and a corroded or loose connection can cause voltage drops that reduce efficiency or fail the pump entirely. Regularly inspect the wiring routing for chafing or pinching, and confirm that insulation remains intact. Corrosion on terminals, ring lugs, or fuse blocks signals a maintenance need. In some trucks, a dedicated isolator or a separate battery for the pump can protect the main vehicle battery from heavy draw during peak usage or extended off-grid operation. This isolation helps prevent a dead-start scenario in the middle of a lunch rush. A multimeter becomes a simple but powerful tool here. Routine voltage checks on the pump circuit help you catch gradually retreating charge or creeping resistance that can foreshadow a failure. When readings drift or flicker, it is time to re-tighten connections or replace worn wiring before the problem escalates.
Mounting the pump is more than a mechanical step; it is about creating a quiet, durable home for the heart of your water system. A stable, vibration-damped installation reduces wear and keeps noise to a minimum—a small but meaningful benefit in a kitchen where every decibel matters. The pump should rest on a flat surface, ideally within reach of the water tank and with enough clearance for air flow and maintenance access. Some operators choose rubber mounts or anti-vibration pads to absorb motor vibrations. This simple practice reduces not only noise but the risk of vibration-induced loosening of fittings over time. A clean, dry mounting location also helps prevent corrosion and makes routine checks easier, which ultimately lengthens the time between big overhauls.
Beyond the physical installation, routine attention to the plumbing network ensures long-term reliability. The system benefits from a backflow prevention device placed downstream of the pump, which protects the potable supply from contamination during damper-on, faucet-off cycles and storage changes. A backflow device is not just a best practice; in many jurisdictions it is a regulatory requirement for mobile food units. Ensuring it is properly installed and accessible makes routine testing and any future servicing straightforward. Alongside backflow protection, consider a pressure relief valve as an added safeguard against overpressure. In the compact world of a food truck, systems can be pressurized quickly as demand spikes, and a relief valve helps prevent leaks and potential damage to hoses and fittings.
The maintenance plan should also address the air that can lurk in the system. Fans or vents in the utility area help maintain airflow around the pump and reduce heat buildup, but the design must avoid routing air through water lines. Air pockets can hamper priming, reduce flow, and create inconsistent pressure at the taps. A bleed or purge procedure—opening all fixtures briefly to purge air after maintenance or hose replacement—will often be enough to restore smooth operation. The principle is simple: a well-purged system primed with clean water keeps the pump from hunting for prime during service, which in turn extends its life and sustains consistent performance.
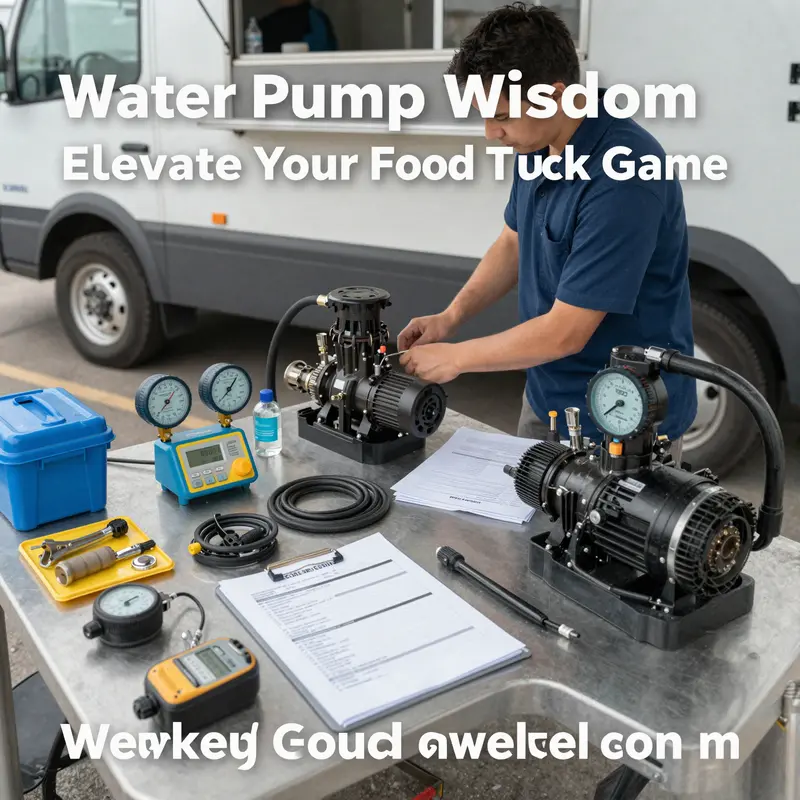
Maintenance becomes even more meaningful when aligned with a testing rhythm that mirrors the realities of service demand. A weekly functional test is a pragmatic baseline. During a test, you power the pump and open a faucet to verify that the pump primes properly and delivers a steady, predictable flow. Listen for irregularities: whining or grinding noises can signal internal wear, while a stumble in flow can indicate air pockets or partially blocked lines. The absence of a satisfying flow is as telling as the presence of a leak. A pressure gauge, if installed, provides a baseline reading consistent with your system’s design pressure, and you should find it within a comfortable range—often in the 40 to 60 psi band for many sinks and dishwashing stations. If your gauge shows a markedly different reading, approach the issue as a multi-step investigation: confirm the inlet is clear, inspect the valve that controls flow to the outlets, and verify that fittings remain tight and undisturbed.
A more formal test routine includes a pressure test. The idea is to validate that the pump can maintain the required output when demand spikes or when multiple fixtures run at once. This is especially important in a busy service window when multiple sinks or devices draw water. A steady pressure under simulated load confirms the integrity of seals, valves, and the discharge path. If pressure falls or fluctuates significantly, you might be dealing with worn seals, a partially blocked discharge line, or a leak somewhere in the network. Regularly charting pressure over time helps you spot trends—slightly drifting numbers over weeks can be a sign that a seal is approaching failure or that a domesticated gas of air is collecting in the line.
The safety and reliability of electrical and mechanical systems in a mobile kitchen are inseparable from the conditions under which the drain and water systems operate. The built-in thermal overload protector is a critical safety feature that should be exercised with regular checks. During extended runs or when the system approaches high-load conditions, the motor can heat up. The overload protector is designed to trip before motor windings incur damage. Verify that this protective feature functions correctly by running the pump under a controlled load and watching for a pause or shutoff that indicates a working thermal guard. If you observe frequent trips, it is a clear sign to address ventilation, load management, or possible blockages that cause the motor to overheat.
In some setups, an emergency backup plan is wise. If your layout includes a secondary pump or a manual hand pump, test it monthly to ensure that, in the event of primary pump failure, you can still access water. The goal is not to create redundancy for redundancy’s sake but to guarantee continuity of service during a shift. The backup mechanism should be simple to operate, clearly accessible, and well understood by the team. Documenting these checks builds a culture of preparedness that feels invisible during calm days but shines when the unit must perform under pressure.
A broader view of maintenance and testing extends into battery management, which is the energy backbone of the system. The pump’s performance is intimately tied to the health of the vehicle’s battery bank. A weak battery reduces prime efficiency, increases startup time, and heightens the risk of erratic pressure. Regular battery voltage checks with a multimeter provide early warning signs of declining capacity. For crews running long shifts or operating off-grid, a dedicated battery isolator can shield the main vehicle battery from discharge during pump operation, preserving starting reliability for the truck’s other essential systems. The battery story also touches charging regimes: ensure the alternator or charging system maintains charge during operation and that solar or other supplemental charging sources are managed to avoid overdischarge.
Maintenance and testing hence form a continuous loop rather than a checklist moment. When you clean, check, and test in a disciplined pattern, you build a reservoir of reliability that becomes part of the kitchen’s rhythm. The narrative of reliability is not only technical; it is cultural. It shapes how the crew treats water usage, how they respond to a drip as an urgent signal, and how they approach the potential chaos of a crowded service window with calm competence. The result is a kitchen that can deliver consistent service, sustain health standards, and ride the unpredictable tides of mobile operations with confidence.
To connect this practice with broader insights beyond the day-to-day, consider the value of experiential learning from other mobile and off-grid setups. For a perspective that translates well to the way mobile kitchens adapt to remote or off-grid circumstances, see this discussion of off-grid adventures in mobile kitchens: Unleash off-grid adventures. The idea is simple: when a vehicle becomes a small, self-contained ecosystem, every component—water, power, waste, and air—must be understood as part of a whole that must stay in balance even when external resources are limited. The pump is a core organism within that ecosystem, and its care reflects the care you give the entire operation. The discipline of maintenance and testing, practiced consistently, translates to fewer service disruptions, happier customers, and a kitchen that can meet the demands of a bustling service day with minimal drama.
The guidelines above are not merely about keeping equipment functional; they are about enforcing a standard of safety and compliance that aligns with health regulations and fire safety expectations for mobile food service. potable water quality begins with the materials you use in the lines and fittings. Always choose components rated for potable water and designed to resist leaching, corrosion, and microbial growth. In a mobile setting, the temptation to cut corners is real, but the consequences can be costly. A backflow prevention device, a clean-water path, and a correctly purged system create a safer environment for both staff and customers. And while the maintenance routine is internal to the truck, it resonates with the broader regulatory ecosystem that governs mobile cooking. Local health codes often emphasize the integrity of water systems and the containment of wastewater; failing to maintain a dependable pump can place the operation at risk of noncompliance during an inspection. Keeping records of maintenance activities and test results can be as important as the checks themselves, providing a traceable history that supports inspections and audits.
In conclusion, the maintenance and testing of a water pump in a food truck embody a practical philosophy: prevention, precision, and preparedness. The path to reliability begins with small, consistent actions—checking for leaks, cleaning filters, securing connections, and validating electrical health. It continues with deliberate testing routines that confirm function under real-world loads and conditions, and it culminates in a safety-first mindset that keeps the entire mobile kitchen ready to meet the day’s demands. When these practices are woven into daily operations, the water system becomes not a precarious piece of equipment but a reliable ally in delivering safe food, smooth service, and sustainable performance on the road. For operators who want to connect these micro-level routines to broader journeys of mobile living and resilient design, the approach is the same: nurture the flow, monitor the pressure, and respect the system that makes every dish shine under the pressures of service.
External resource: For safety standards and detailed guidance on water system integrity and electrical safety in mobile kitchens, refer to NFPA guidelines: https://www.nfpa.org/Code-Updates/2025/NFPA-96-Standard-for-Ventilation-Control-and-Fire-Protection-of-Commercial-Cooking-Operations
Final thoughts
In the heart of Lakewood, where culinary dreams come alive on wheels, having a dependable water pump is as crucial as the flavors you serve. From understanding what pump best fits your food truck need, to executing a robust installation, and keeping it well-maintained, each step enhances not only your efficiency but also the overall experience for your customers. Embrace these insights and keep your food truck’s operation seamless and compliant, ensuring every dish served reflects the care you put into your business.